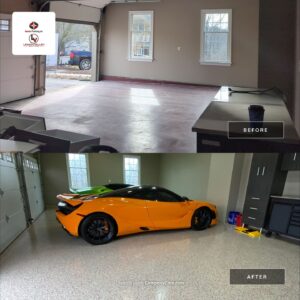
Epoxy flooring can significantly enhance the functionality and appearance of your garage, transforming a plain concrete floor into a durable, stain-resistant, and aesthetically pleasing surface. Whether you’re considering a DIY project or hiring professionals, understanding the process and requirements is crucial for achieving a successful outcome. This article will guide you through the essential steps and considerations involved in epoxying your garage floor.
Key Takeaways
- Epoxy flooring offers a durable and stain-resistant surface that improves the aesthetics and functionality of garage floors.
- Proper surface preparation, including cleaning, degreasing, and repairing, is crucial for the successful application of epoxy.
- DIY epoxy application can be cost-effective but requires specific tools and skills, making professional installation a viable option for many.
- Epoxy floors enhance lighting due to their reflective properties and can be customized in colors and textures to fit personal preferences.
- Long-term benefits of epoxy flooring include resistance to chemicals, ease of maintenance, and potential cost savings from durability.
The Art of Epoxy: Transforming Your Garage Floor
Choosing the Right Epoxy
Selecting the perfect epoxy for your garage isn’t just about picking a color that matches your tool chest. It’s about finding a formula that stands up to the wear and tear of your automotive hobbies and the occasional dropped wrench. Consider factors like durability, drying time, and resistance to chemicals to ensure your floor looks as good as new for years to come.
Prepping the Surface
Before you can transform your garage into a showroom for your vehicles, you need to prep the surface. This means ensuring the concrete is clean, dry, and free of any cracks or grease. It’s not the most glamorous part of the process, but it’s crucial for a smooth application and a durable finish.
Application Techniques
Applying epoxy might seem as easy as mixing paint, but there’s an art to getting it just right. Use a roller for an even coat, and consider using a squeegee for those hard-to-reach areas. Remember, patience is key—rushing the job can lead to bubbles and uneven surfaces, turning your sleek garage into a DIY disaster zone.
DIY or Call the Pros? Weighing Your Epoxy Options
Cost Comparison
When it comes to epoxy flooring, your wallet might feel the pinch either way, but the devil is in the details. Professional installation typically ranges from $3 to $12 per square foot, depending on the complexity and quality desired. On the flip side, rolling up your sleeves and doing it yourself might only set you back about $2 to $5 per square foot. Here’s a quick breakdown:
| Type | Cost per square foot |
|---|---|
| Professional | $3 – $12 |
| DIY | $2 – $5 |
Time Investment
Opting for a professional might seem like a shortcut, but remember, time is money! Professionals can usually complete the job in a fraction of the time it would take you. DIY, while cheaper, could take up your entire weekend or more. It’s not just about laying down the epoxy; it’s about the preparation and the cleanup too.
Skill Level Required
Let’s face it, not everyone is cut out for DIY epoxy flooring. It requires a fair bit of know-how and a steady hand. Professionals bring years of experience and a guarantee of quality. If you’re not confident in your ability to mix and apply epoxy smoothly, it might be wise to leave it to the pros. After all, a botched job can leave a lot of room for error and additional costs in fixes.
Preparation Perfection: Setting the Stage for Epoxy
Cleaning the Concrete
Before you even think about mixing your epoxy, the concrete needs a spa day. Start with a clean and dry surface; any dirt or debris can throw a wrench in your epoxy’s adhesion, leading to a less than stellar finish. Sweep, vacuum, and ensure the surface is spotless.
Repairing Cracks and Chips
Next up, play doctor with your floor. Inspect for any cracks or chips and fill them up. This isn’t just cosmetic; it’s crucial for preventing moisture from undermining your epoxy job. Use a quality concrete filler or patch product, and make sure it’s fully cured before moving on.
Degreasing and Etching
Finally, it’s time to get a bit aggressive with your prepping strategy. Degrease to remove any oily spots, then etch the concrete to provide a rough surface for the epoxy to cling to. This step is vital for ensuring that your epoxy doesn’t just slide off like a bad toupee in a windstorm. A combination of commercial degreaser and etching solution will do the trick, followed by a thorough rinsing and drying.
Remember, the better you prepare the concrete, the smoother your epoxy application will go. It’s all about laying the groundwork for a flawless finish.
Laying It Down: Applying Your Epoxy Like a Pro
Mixing the Epoxy
First things first, let’s mix things up a bit—literally. Ensure your epoxy mix is homogenous before you start laying it down. This isn’t a salad dressing; you can’t just give it a quick shake and call it a day. Stir thoroughly to avoid any surprises.
Applying the First Coat
Now, the fun part begins. Start by cutting in along the edges with a brush or roller pad designed for epoxies. It’s like coloring inside the lines, but more satisfying because you’re one step closer to a stunning garage floor. Pour the epoxy onto the floor in a long, narrow strip and use a roller with a medium nap to spread it evenly. Work in small sections to maintain a wet edge, and remember, start applying the coating as soon as the epoxy mix is ready.
Adding a Second Coat for Durability
Patience is a virtue, especially when it comes to epoxy. Wait at least 12 hours before slapping on that second coat. This isn’t just about making it thicker; it’s about making it tougher. Roll out the epoxy heavier than you think is needed; it’s better to go overboard than to end up with a floor that lacks luster and durability.
After the Epoxy Sets: Post-Application Care
Curing Time
Patience is a virtue, especially when it comes to letting your epoxy floor cure. Allow the epoxy to set and harden for the recommended period, typically 24 to 72 hours, before you even think about stepping on it. This waiting period ensures your floor’s durability and shine.
Maintenance Tips
Keep your shiny new floor looking its best with regular maintenance. Sweep daily to avoid dirt buildup and clean spills promptly to prevent stains. For a deeper clean, a vinegar or ammonia solution can work wonders, especially for greasy stains.
Dealing with Wear and Tear
No floor is invincible, not even an epoxy one. Over time, you might notice some wear or minor scratches. Apply a fresh topcoat every few years to keep it looking new, and always refer to the manufacturer’s guidelines for specific care instructions.
Brightening Your Space: The Aesthetic Benefits of Epoxy Floors
Enhanced Lighting
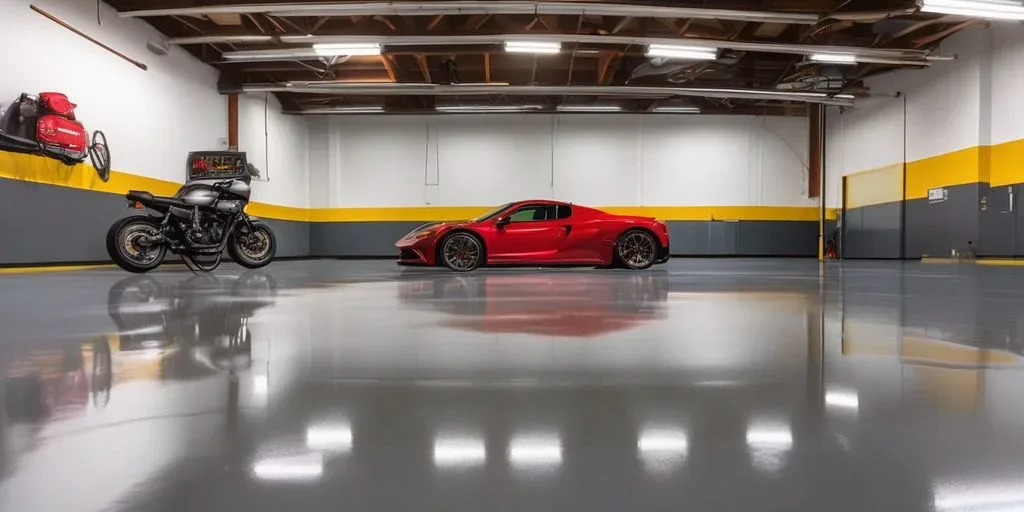
Who knew a floor could brighten your day—literally? Epoxy floors are highly reflective, especially when you opt for lighter colors or glossy finishes. This means they can significantly improve the lighting in your garage by reflecting overhead lights. It’s a simple trick that makes your space look bigger and brighter without adding a single bulb.
Seamless Finish
Imagine a floor without seams, ridges, or cracks. That’s the beauty of epoxy. It creates a smooth, continuous surface that not only looks sleek but is also easier to clean. No more dirt trapped in tile lines or concrete cracks! This seamless nature makes your garage feel more like a part of your home, rather than just a storage area.
Custom Colors and Textures
The real fun begins when you start exploring the custom options available with epoxy. Whether you’re a fan of vibrant colors, subtle hues, or fancy a bit of glitter, there’s an epoxy mix out there for you. Mix and match to your heart’s content to create a floor that’s as unique as your garage hobbies.
Epoxy flooring ensures that your garage maintains its pristine appearance, free from the unsightly effects of common chemical exposures. It’s not just a floor; it’s a statement.
The Long Haul: Durability and Longevity of Epoxy Floors
Resistance to Chemicals
Epoxy floors are not just about looking pretty; they’re tough cookies too! Resistant to motor oil, gas, bleach, acids, and more, these floors laugh in the face of spills and splashes. Perfect for the garage where chemicals are as common as dirt!
Handling Heavy Loads
Don’t worry about dropping your tools or that heavy engine part. Epoxy floors are designed to handle the heavy stuff. They distribute weight evenly, preventing damage and keeping your floor looking smooth and unscathed.
Long-term Cost Benefits
Thinking long-term? Epoxy floors are your financial friend. With a lifespan that can stretch over two decades, the initial investment pays off big time. Plus, they require minimal upkeep compared to other flooring types, making them a wallet-friendly option over the years.
Fun Fact: With proper installation and maintenance, epoxy floors can last from 10 to 20 years or more, even in high-traffic areas.
Explore the remarkable benefits of epoxy flooring with our latest article, ‘The Long Haul: Durability and Longevity of Epoxy Floors’. Discover how our solutions can enhance the durability and aesthetic of your spaces. For more insights and to get a free quote, visit our website today!
Wrapping It Up: The Epoxy Chronicles
Well, folks, we’ve rolled our way through the sticky world of epoxy flooring like a well-oiled paint roller! From the nitty-gritty of preparation to the glossy finish of the final coat, we’ve covered it all. Whether you’ve decided to dive into the DIY deep end or hire a pro to avoid the mess, remember that every great garage transformation begins with a single step… or a single drop of epoxy. So, grab your gear, muster your courage, and may your garage floor shine brighter than a showroom!
Frequently Asked Questions
Can I apply epoxy to my garage floor by myself?
Yes, you can apply epoxy to your garage floor yourself if you have the necessary tools and follow the correct procedures. However, for best results and durability, it’s often recommended to hire a professional, especially if you are not experienced with epoxy applications.
What are the necessary materials for a DIY epoxy garage floor?
For a DIY epoxy garage floor, you will need brooms, a push squeegee, concrete etcher, power washer (optional), scrub brush, and concrete crack filler. Additionally, you’ll require the epoxy coating materials and any specific tools for application.
What steps are involved in prepping the garage floor for epoxy?
Prepping the garage floor for epoxy involves cleaning the concrete, repairing any cracks and chips, degreasing, and etching the surface to ensure the epoxy adheres properly.
How do I clean the garage floor before applying epoxy?
Start by scraping off any dried paint or materials stuck to the concrete using a putty knife and scraper. Then, thoroughly sweep and wash the floor, using a power washer if available, to remove all dirt and debris.
What are the benefits of epoxying a garage floor?
Epoxy provides a durable, stain-resistant surface that is easy to clean and enhances the appearance of your garage. It also fills and covers cracks, creating a unified, seamless floor. Highly reflective epoxy options can improve visibility in dimly lit spaces.
How long does it take for an epoxy floor to cure?
The curing time for an epoxy floor can vary depending on the product used and environmental conditions, but it typically takes about 24 to 72 hours for the epoxy to set and cure completely before it can be fully used.


